

Hey crafty friends! 👋 I’m popping in to share a card I made using some of my favorite Tim Holtz stamps and stencils from Stampers Anonymous.
Fun fact: Stampers Anonymous doesn’t retire their Tim Holtz designs, so there’s a huge library of awesome stamps and stencils you might not have seen in a while (or totally forgot you had 😉).
Hope this project sparks some inspiration to dig into your stash and get creative! ✨
Don’t want to miss any of my shares? You can subscribe to my email newsletter and choose to get an email each time I update my site- subscribe here.
Collage Greetings, Tim Holtz
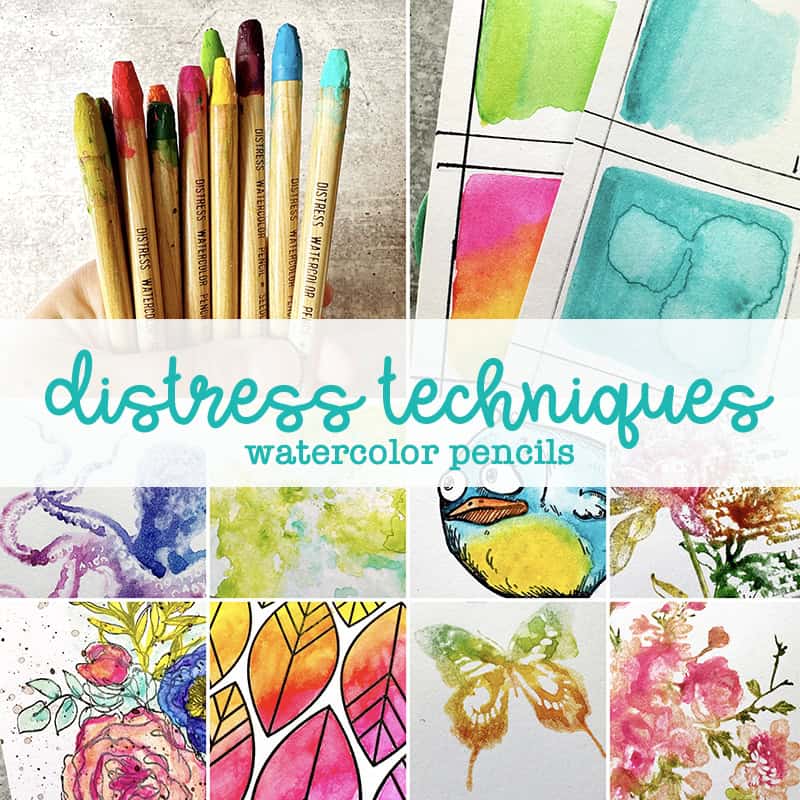
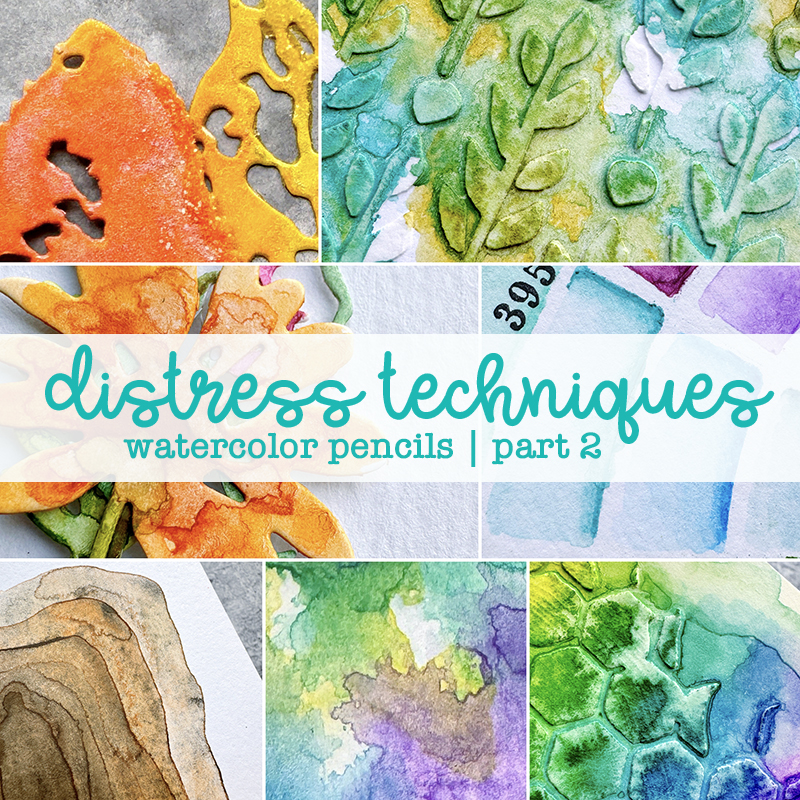
All of the elements on these cards were created with Distress Watercolor Pencils (except for the sentiments), and you know how much I love this medium! I have so much fun inspiring you to explore your Distress Watercolor Pencils, and if you’re looking for more guidance, don’t forget that I have two dedicated Distress Technique classes all about them.
I’ve also incorporated them into several online Lawn Fawn classes, including:
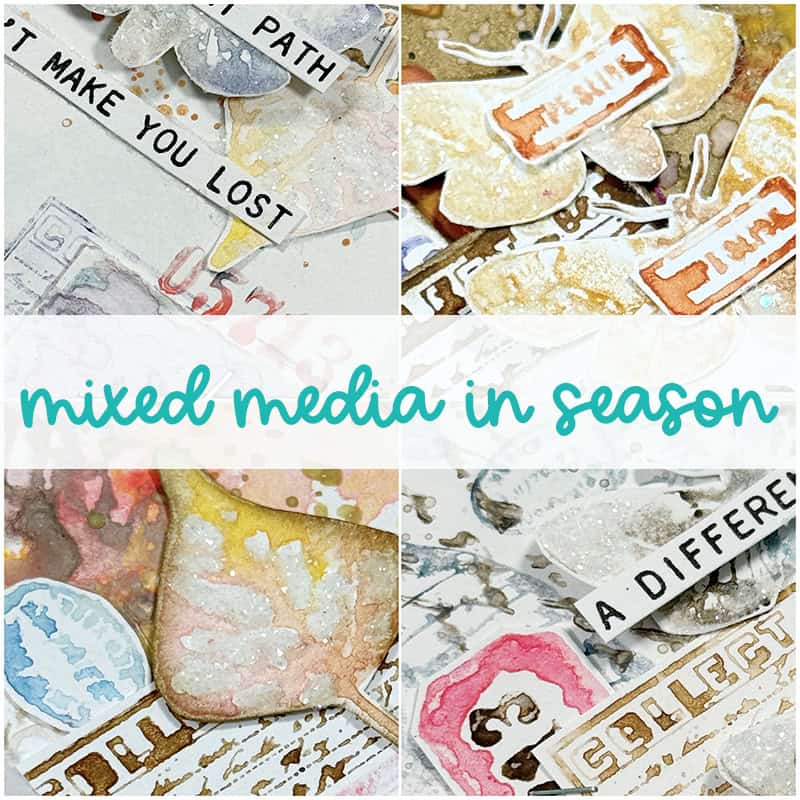
…just to name a few! And there’s the Mixed Media In Season online class as well, so many options to explore, learn, and practice with Distress Watercolor Pencils.
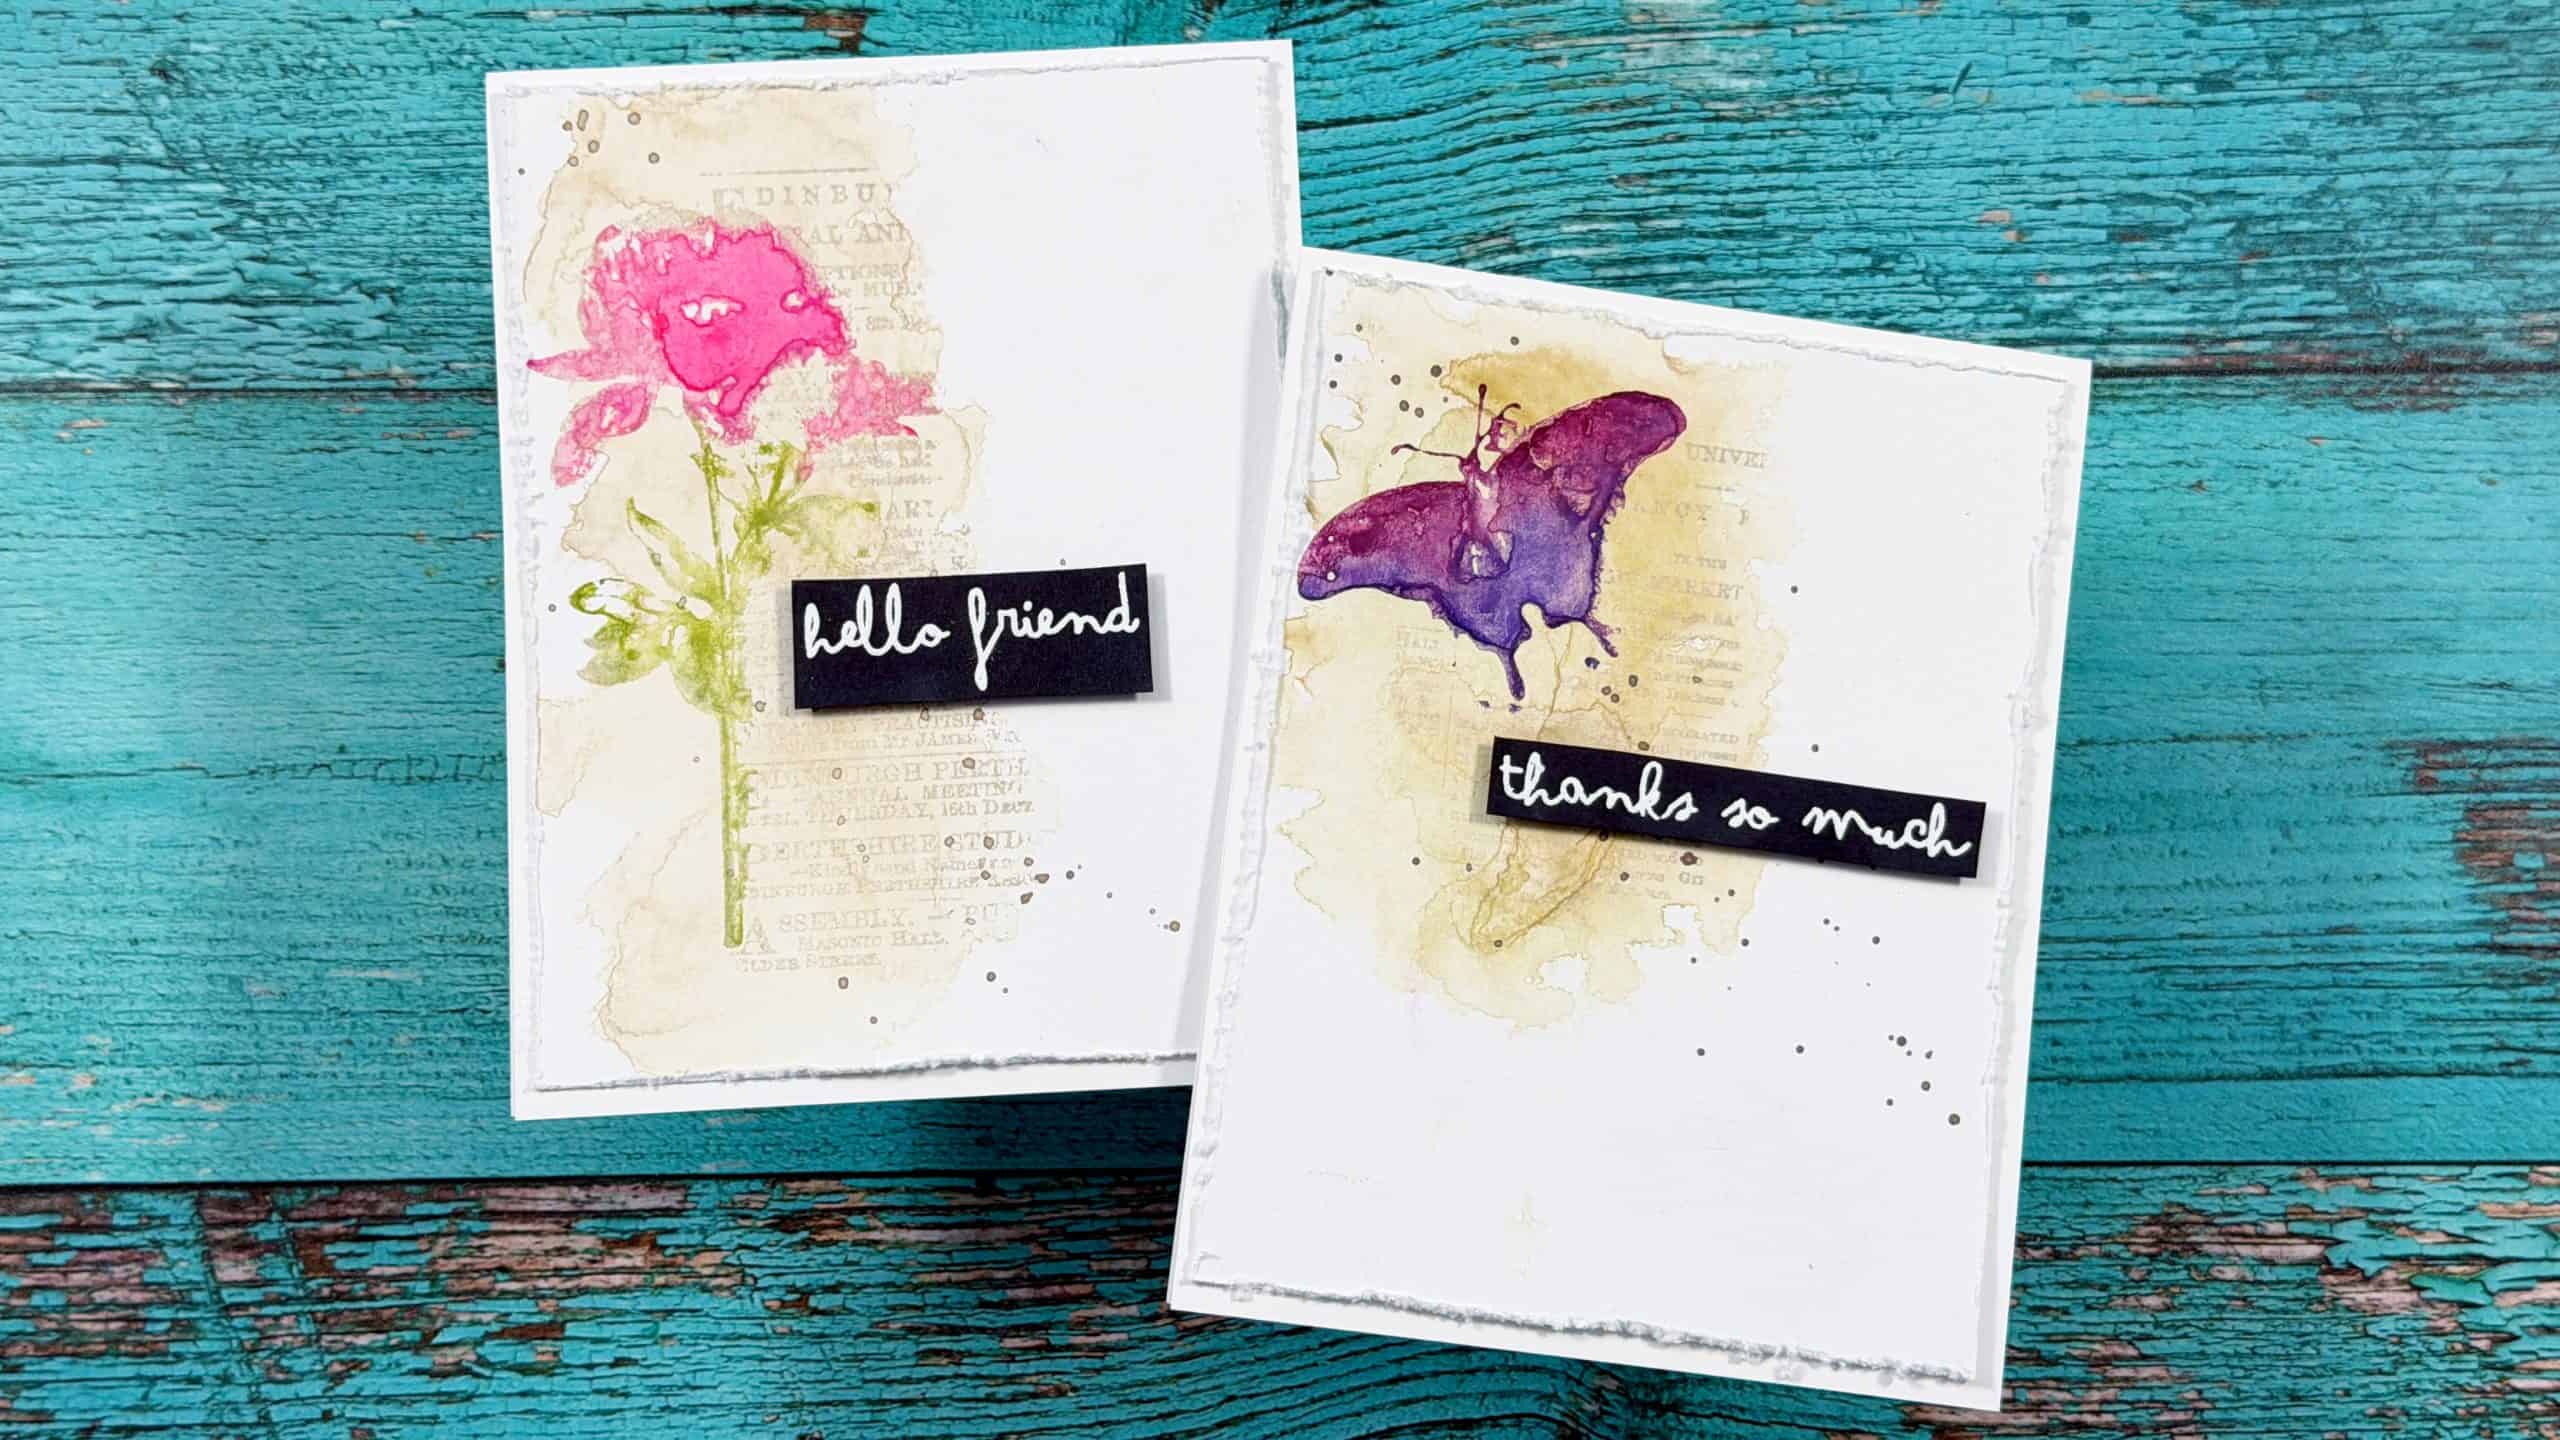
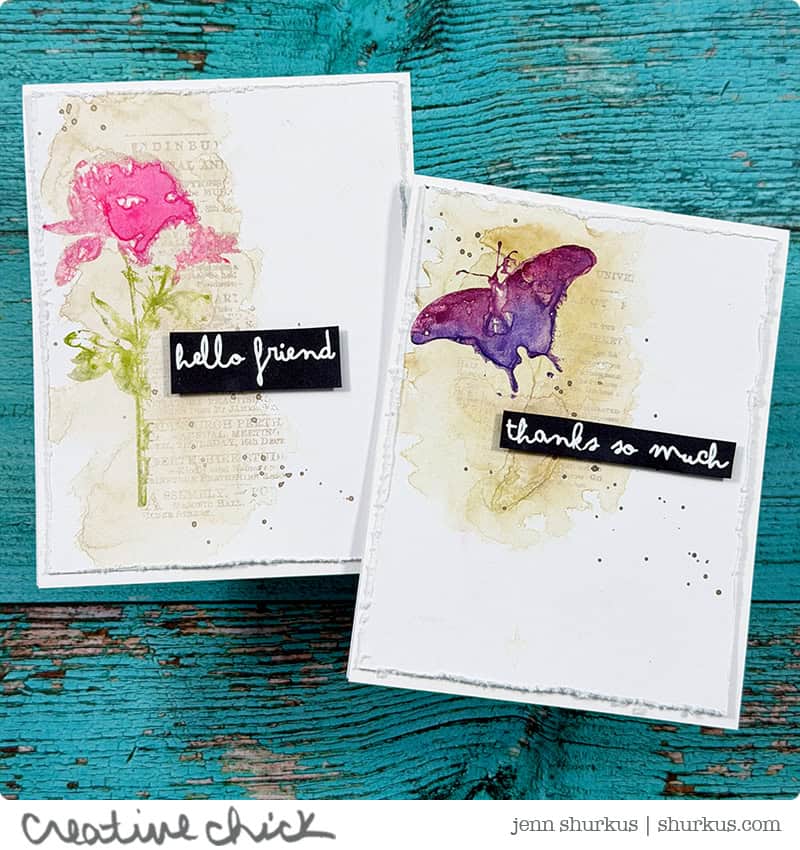
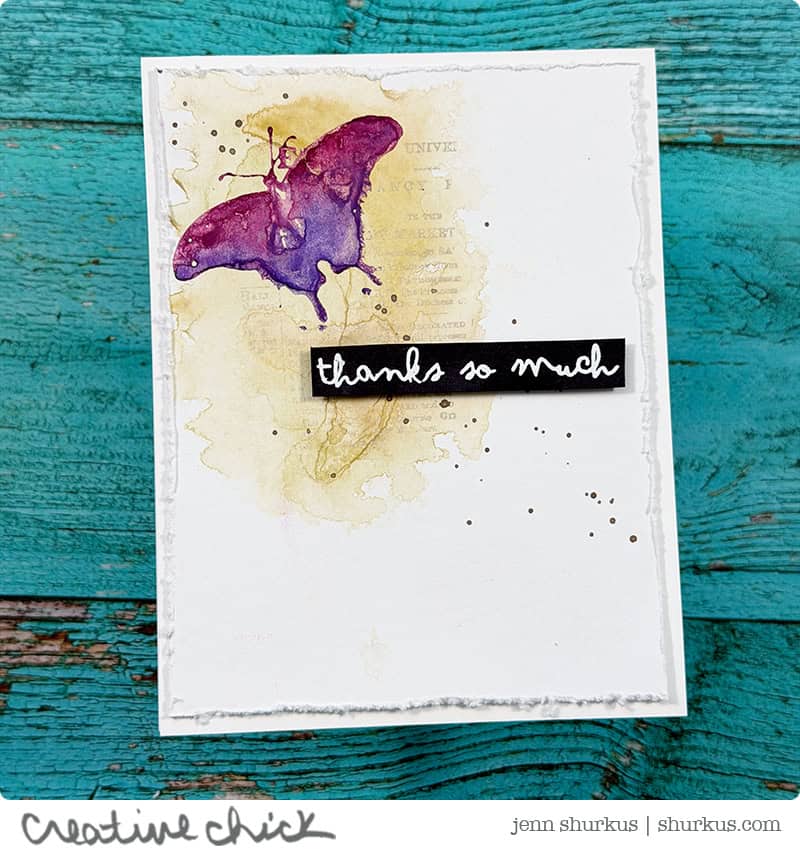
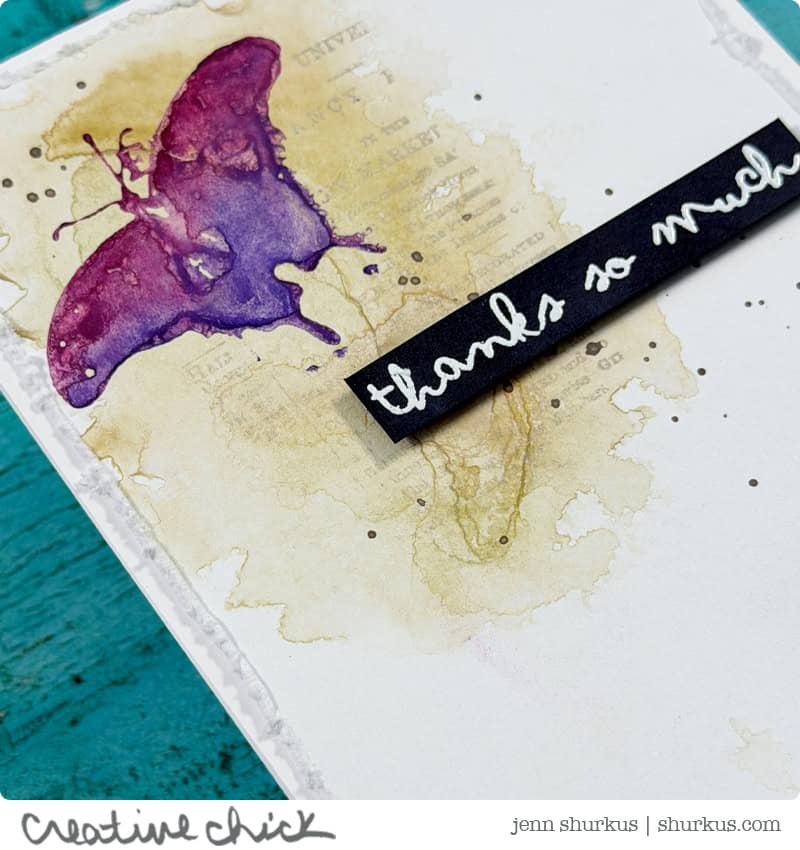
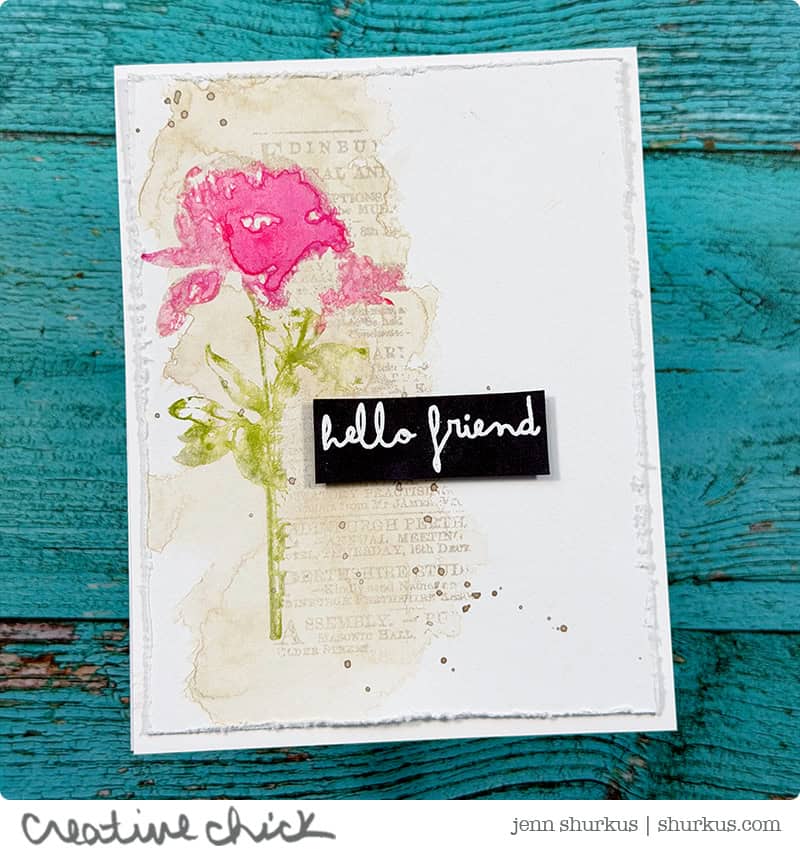
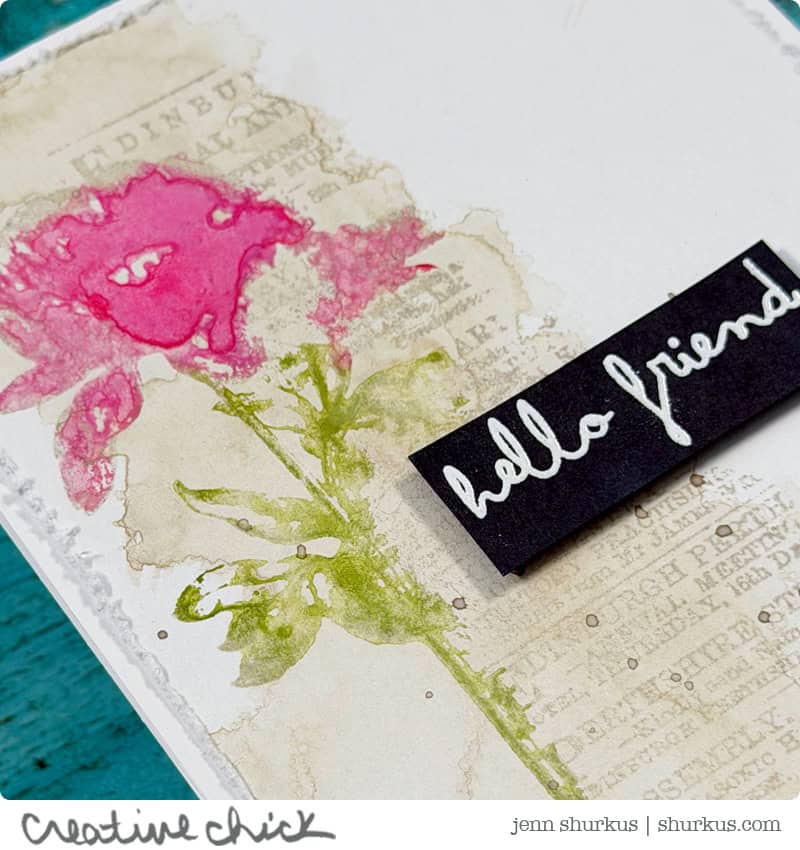
Ok, back to the cards I’m sharing with you today! I started by adding a wash of pigment using Pumice Stone Distress Watercolor Pencils and a piece of acetate to control where the pigment lands on just parts of the background, on Distress Watercolor Cardstock.
Once dry, I splattered some Pumice Stone Distress Watercolor Pencil pigment onto the background to add a bit of texture.
After that dried, I stamped the image, which includes the focal image and some text, using Antique Linen Distress Oxide Ink Pad. Using a stamping platform to keep the stamp in place, I applied Distress Watercolor Pencils directly to the focal image, using multiple colors at once. I dipped each pencil into a cup of water to soften the pigment, which makes it easy to scribble color right onto the stamp.
I then stamped the focal images again, overlapping the original impression while leaving the text portion alone.
I trimmed the panels down to 4″ x 5.25″ and used a Paper Distresser on the edges to rough them up and add some beautiful texture. The panels were then adhered to the card bases with foam tape.
For the sentiments, I white embossed them onto black cardstock and cut them into rectangular strips, then added them to the cards with foam squares.
The full shoppable supply list is waiting for you at the bottom of this post, everything is linked and ready to go so you can dive right in!
I’d love to see what you create, tag me on social media. Your projects seriously make my day, and I can’t wait to cheer you on!
Don’t want to miss any of my shares? You can subscribe to my email newsletter and choose to get an email each time I update my site- subscribe here.
Cardmaking Supplies Used
Supplies I used are linked throughout the post. Click on the picture and you will be taken to the product. I use affiliate links when available which means if you make a purchase I get a small commission at no extra cost to you. Thank you for your support!


0 Comments for “Collage Greetings, Tim Holtz”