The Lawn Fawn Design Team, Lawnscaping Team and some peeps from the Lawn Fawn Headquarters are featuring all of Lawn Fawn’s Holiday sets this week. If you need holiday inspiration… this is for you! How awesome is that!?
This year I wanted to give you some inspiration for holiday cards with non-traditional colors. Those who have taken card classes with me know I always end up tossing in a hot pink, lime green and of course teal holiday card- and I wanted to share these ideas with you! If you missed my Joy card Tuesday you can see it here. You can also see my Let It Snow card from yesterday. Also be sure to read to the bottom as I am sharing details about my Crop on the Cape class which will be in March!
This card is great because the supplies are minimal AND you can recreate it very easily and fast!

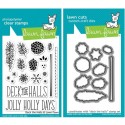
This card only uses the Deck the Halls set from Lawn Fawn and the Tag You’re It Lawn Cuts dies.
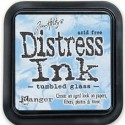
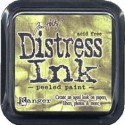
I first took a bunch of the pine boughs in the stamp set, and set them up on an acrylic block in a cluster. I then stamped them all over on a piece of Distress Watercolor paper with Peeled Paint Distress Ink. I didn’t re-ink the stamp each time so I used the 2nd generation of stamping to get a variation of ink. Remember when stamping a background with a repetitive image be sure to stamp off the edge to show movement across the card. Then I took a waterbrush and brushed all over the pine boughs to soften them and give them a watercolor look. If your paper is very wet then heat set it now. I then stamped the berries here and there with Picked Raspberry Distress Ink. The small snowflakes that are included in the set I stamped with Tumbled Glass Distress Ink to fill in the spaces. I didn’t water color these smaller details because I didn’t want to loose the detail.
I added a little quickie glue pen and ultra fine glitter to the snowflakes.

For the tag, I cut it once from Lawn Fawn Let’s Polka paper, and once from the Distress Watercolor paper. To stamp the sentiment in sections, it’s actually quite easy! The sentiment “Jolly Holly Days” is spaced out quite a bit, so it’s easy to dab the mini Distress Ink on one word at a time. I used Picked Raspberry again for this. Traced the letters with a quickie glue pen and dipped it into ultrafine glitter.

I finished the card off with gluing a reinforcement on the sentiment tag, and tying off a bit of May Arts sheer polka dot ribbon. Still one of my favorite ribbons ever!
I made a similar card for the classes I have been teaching this fall in more traditional colors you can see that here

I hope you enjoy this card and see how easy it will be to make a whole set of these! Time to get those holiday cards done!
Don’t forget to check out all the other FABULOUS creations this week on the Lawn Fawn blog– some serious inspiration can be found over there!!
Before I go I also wanted to let you know that registration for Crop on the Cape has started. This is a crop held on Cape Cod in Massachusetts in March. I have been part of this crop (either by helping organize and/or teaching) for 10 years now! Crazy! Anyways, I am wicked excited about the class I will be teaching during the crop. It is Watercolor Techniques with Lawn Fawn. Now, before you get all nervous and think it’s too artsy for you- you’re wrong! I am going to show you 4 easy ways to use Distress Ink pads to create a watercolor effect on your cards. You can use these same techniques for pocket scrapbooking, traditional scrapbooking or even in your art journal! Now if you haven’t attended this crop before- you want to! Trust me! It is a really fun time and there is a mix of people that attend there are scrapbookers, cardmakers, sometimes there are even people there just knitting!
If you have any questions about the event I am happy to answer them for you or if I don’t know the answer I can direct you to Jayne who organizes the event. AND if you are not sure if you can attend the whole weekend, but just want to come to my AWESOME class- then stay tuned… as the event gets closer Jayne usually opens up the classes to the general public! Hope to see you there!! Here’s a peek at my class:












Loooove your cards! Those pine backgrounds are superb!!
Wow!! Love, love, love!!
Love both cards and I have this set! Will have to try it…hopefully this holiday season LOL!
do it!!! and then share it with me 🙂 would love to see!!!
Very pretty and I love
all the different pine
boughs you used.
Carla from Utah
thank you Carla! Love that little “deck the halls” set from Lawn Fawn- thank you so much for all your blog comments I appreciate them 🙂
Love the layout of these merry Christmas cards. The background you’ve created is super cute!
thank you so much becca!!
Great cards! Love the tips that you provide to assist us “newbies” in creating backgrounds, etc. Thanks for the inspiration!
Thank you Beth! I will be sure to add more tips and always happy to answer any questions you may have 🙂