 I am back with a Simon Says Stamp Wednesday Challenge card!
This week’s challenge is Thinking of You – the design team is featuring Prima Marketing! They have so many fun and different products it was hard to choose what to work with. After the Mixed Media Loft Art Retreat this past weekend I wanted to keep up with the artsy fartsy techniques and decided to create an art panel with Prima’s Sea Sally Mixed Media Doll Cling Stamps.

I have had this stamp in my stash since the start of summer. I love all things nautical and knew I needed this mermaid! She was just as fun to play with as I have imagined! This weekend we played a lot with the Ranger Texture Paste and the new Distress Spray Stains and I thought it would be perfect to create a realistic mermaid tail. Can’t wait to hear what you think!

I put together a photo tutorial so you could see how easy it was to pull this project together and to hopefully inspire you to play!

I started by stamping Sea Sally into 2 parts on Distress Watercolor Paper with Potting Soil Archival Ink. Sea Sally is a long stamp as you can see and I wanted her tail to be separate from the rest of her. I used Archival ink because I was going to be watercoloring and using the Texture Paste so I needed a permanent ink.

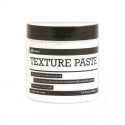
Using the Dina Wakley Media palette knife (it’s plastic, and very flexible which worked perfectly for this) I spread the Ranger Texture Paste on the tail. I thought this was going to be tricky, to keep it in the lines- BUT it actually went smoother then I thought. Just like frosting a cupcake, well as close as I am going to get to frosting anything. HA!

Because I was creating this project a bit last minute I needed to speed things along. I like how the Ranger Texture Paste heat sets pretty well. You can see Mister Harley was supervising my project 😉

Once the Texture Paste was dry I misted the paper with water. I then misted it with Distress Spray Stains. I started light to dark with Mustard Seed, Crushed Olive and then a touch of Peacock Feathers. I then heat set the tail again. Look how vibrant the colors stay and how the Distress Ink absorbs into the nook and crannies! YUM!!

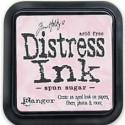
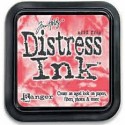
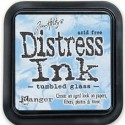
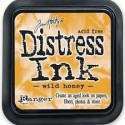
I then needed to add color to the top of Sea Sally. I decided to watercolor her with Distress Inks. I like to smooch them out on an acrylic blog to create a paint palette. I put a sheet of white paper underneath so I can see the true colors as I paint. I used Spun Sugar for her skin, “rosying” her cheeks with a little bit of Worn Lipstick. I then painted her hair with Wild Honey and Rusty Hinge. Her bra and headband were colored with Peacock Feathers. I then shaded around all of her with Tumbled Glass so I wouldn’t have to fussy cut right on the edge of the stamped line.


Since Sea Sally is a larger image, larger then an A-2 card, I decided to create an art panel with her instead. I cut a piece of chipboard to be 4×8. I then spread Texture Paste all over. And colored it the same way I did the mermaid tail, only this time I used Broken China, Salty Ocean and a bit of Peacock Feathers. I then heat set the background. It did bubble up a bit, but I liked that effect. I fussy cut out Sea Sally.


I used Scor-Pal Tape to adhere her tail to her body. I then flipped her over and was very generous with the foam tape. I am usually a bit more conservative, but since this was going on an art board, and will be displayed and will be adhered to a textured surface more foam tape is better. I peeled off the back of the foam tape, and then added glossy accents to all the foam tape pieces. Glossy Accents is a strong adhesive and will help adhere Sea Sally to the textured background of Texture Paste. I picked out a sentiment from Tim Holtz Ideology ChitChat stickers. I LOVE these! I didn’t want it to have a typical “Thinking of You” Sentiment, instead an uplifting sentiment that lets whatever friend I send this to know I am thinking of them! 🙂
I stuck them to my Ranger Craft Sheet so I could ink them with a little bit of Wild Honey Distress Ink. I then adhered them to the art board with some glossy accents. I then used some Rock Candy Distress Stickles to embellish her starfish top, and parts of the watery background. Once the Distress Stickles dries it has a mica- type shimmer which is perfect for oceany scenes!

I just adore how she turned out! I hope you enjoyed seeing the process too!
Ok- so now it’s time for YOU to enter the challenge. Create a Thinking of You creation this week, be creative!
Just by playing along and linking up your project to the SSS Wednesday Challenge post you can qualify to enter a $50 shopping voucher to the Simon Says Stamp store.
One lucky winner will be chosen at random, it could be you!
I really hope to see some of my blog readers join in on all the fun and play along with the challenge. I can’t wait to stop by some of your blogs and take a peek at what you have made. Have a wicked fun time creating!
Make sure to check back each Wednesday for another fun challenge over at the Simon Says Stamp Wednesday Challenge Blog!
I am also entering this into the Mixed Media Monthly Challenge. The theme this month is to use stamps on a mixed media project, so this is a perfect fit!
















OH Jenn she is so so beautiful! I really love how you colored all the paste to get such a beautiful ocean water color. She’s stunning! Thank you so much for playing with the Mixed Media Monthly Challenge! 😉
What a fun project – thanks for showing us all the steps too – awesome!
Oooh fun texture! Very cool!!
*mwah*
Steph
Simon Says Stamp!
Oh this is fabulous and love seeing how it all came together.
luv
Debby
hi Jenn, this is awesome, I luv the texture! hope you have a fabby weekend!
sparkle & shine *~*
Hello Jenn,
How LONG did this take you to do? I’m amazed at your process, and can’t imagine how much time you invested and OH SO IMPRESSED and glad that you walk us through the process. I have a great appreciation!
What a beautiful artwork, I’m sure it will be treasured.
Blessings,
Barb
Thank you so much Barb! Want the honest truth? I was in a serious time crunch so I whipped this up on my lunch break.. so about an hour! 🙂 BUT i have this crazy ability to design things in my head when I’m working on other stuff (non- crafty) and then put the ideas in my head to creation when I have time. BUT honestly.. it isn’t that complicated of a project. The Distress Spray Stains make it quick and easy to add color and the texture paste made it easy to add texture. Happy you enjoyed the tutorial! Have a great weekend 🙂
This is an awesome project Jenn! Thanks for the tutorial. Love how you painted with the distress inks. Thanks for joining us at The Mixed Media Monthly Challenge.
Thank you so much Donna! Happy to join you talented girls at Mixed Media Monthly Challenge! 🙂
A wonderful creation Jenn, a fabulous design and gorgeous colour scheme. I love all the scrumptious techniques and textures!!
hugs
Heather xx
This is gorgeous Jenn! Love the background and all of the texture! Fabulous!!
hugs…
Love this! I just so happen to have this same stamp but never used it because it’s so big. Now you’ve inspired me to use all those WICKED AWESOME techniques I learned at the Mixed Media Retreat! I keep thinking about what a great time I had and how much I learned – you’re the BEST teacher, Jenn!
Awwwww thank you so much Liz!! I LOVE teaching 🙂 So happy you had a wicked fun time at the Loft Art Retreat! I look forward to seeing you at the next one 😉 Also can’t wait to see what you create with Sea Sally 😉
Love how this came out!!! The texture is awesome and the colors are perfect!!!
thank you so much lynn!
Ahhh! The texture, the colors – fantastical all of it!! I’ve had a hard time getting some of my heavier textured pieces to stick and stay stuck. Does that Scor-tape work pretty well? I may have to invest in some.
Thank you so much Becca! The score-tape is great for a dry STRONG adhesive for flat surfaces. I would recommend Glossy Accents for a strong wet adhesive for bumpier surfaces. as you can see I used it to adhere the mermaid to the textured background 🙂
You can tell how much fun you had putting this together, and the results are so fun, Jenn! Well done!