{creative chick} | shurkus.com

Jenn Shurkus | designer, creative instructor, artist

  • shop
  • about
  • blog
  • Jennabler Alert
  • online classes
  • online events
    • *Virtual* Creative Journey Art Retreat
    • Creative Journey: an art retreat on Cape Cod
    • Crop on the Cape
  • tutorials
  • Cart
  • My Account
You are here: Home / artsy fartsy / Focus, Mixed Media Canvas

Focus, Mixed Media Canvas

01/11/2015

Last weekend when I was creating my January tag for 12 tags of 2015 I was having so much fun I was inspired to create a canvas. I have made smaller canvases before for my One Little Word and I also offer custom canvases through etsy. This time I was inspired to get super artsy and try some different techniques. A lot of the techniques were similar to what Tim Holtz taught in his January Tag.

So let’s get started!

One Little Word Canvas, Tutorial | shurkus.com

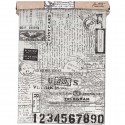
Step 1: I had a 6×12 canvas that I had already put super heavy gesso on. I used Gel Matte Medium to adhere some Postale Tissue Paper in some spots.

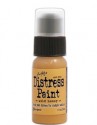
Step 2: With my finger I started spreading on some Distress Paints in Peacock Feathers and Wild Honey.

Step 3: I spritzed the canvas with water to help blend the paints together. I mixed them a bit with my finger and picked up the canvas letting some of the paints drip then heat set.

One Little Word Canvas, Tutorial | shurkus.com

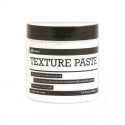
Step 4: Using Tim Holtz Rays Layering Stencil and Ranger Texture Paste– I put some on the canvas, and because I am impatient I heat set it.

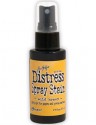
Step 5: I spritzed Wild Honey Distress Ink Sprays on the texture paste. I used a paper towel to soak up the ink in between the rays

One Little Word Canvas, Tutorial | shurkus.com

Step 6: I heat set the Texture Paste

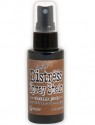
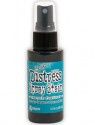
Step 7: I spritzed some Vintage Photo Distress Ink Sprays here and there on the canvas. Letting it drip and pool and heat setting it when I liked the way it looked. I did this on the sides of the canvas as well

Step 7: Using Tim’s Chevron Layering Stencil I put some Chevrons on the canvas with Ranger Texture Paste. Heat set the Texture Paste.

Tip: Don’t worry too much if you get paste where you don’t want it, once you remove the stencil it is easy to wipe away any of the paste that you want. I did this a bit where I had too many chevrons going down the canvas.

One Little Word Canvas, Tutorial | shurkus.com

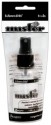
Step 8: Spritz the Chevron Texture Paste with Peacock Feathers Distress Stain Spray. Blot with a paper towel in between the chevrons. Heat set.

Step 9: Using Numbered Layering Stencil and Umber Dina Wakley Paint, I stenciled on “2015” going up the edge of the canvas.

Tip: use a stiff bristled brush when stenciling with paint, that way the paint wont seep under the stencil. I love Dina Wakleys brushes for this!

Step 10: Spread Ranger Texture Paste through Tim Holtz Bubble Layering Stencil. Just here and there.

One Little Word Canvas, Tutorial | shurkus.com

Step 11: Heat set the Texture Paste.

Step 12: Spritz with Vintage Photo Distress Stain Spray. This time I didn’t blot any ink away. Heat Set the paste.

Note: I really think I just added the bubble stencil because I was enjoying just how yummy the paste and sprays were looking 🙂

Step 13: I have been hoarding the Tim Holtz Letterpress Printers Blocks because they are SOOOOO yummy but I felt this was a perfect project for them! Using Antique Linen Distress Paint I dabbed some on the tops of the letters with my finger.

Step 14: Once the letters were dry I dabbed on some Peacock Feathers Distress Paint.

Step 15: Once they were dry I sanded them, taking away some of the paint.

One Little Word Canvas, Tutorial | shurkus.com

Step 16: I inked the letters with Walnut Stain Distress Ink and a Blending Tool.

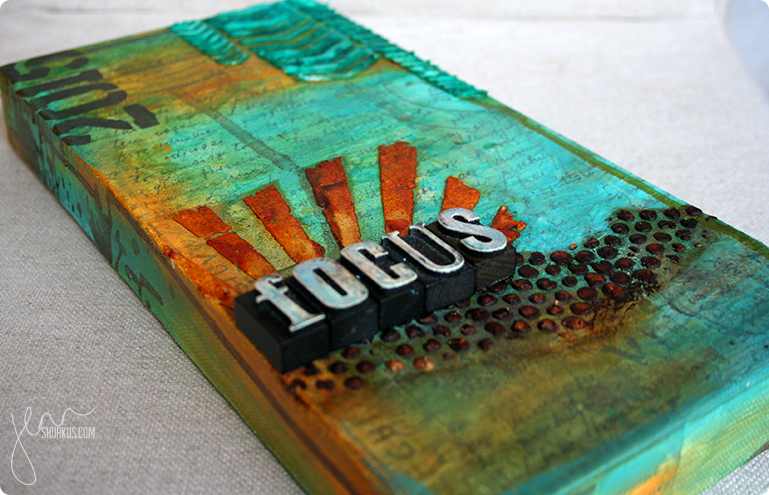
Step 17: I used a generous amount of Glossy Accents to adhere the letters to the canvas

Want to see the final project? I LOVE how it came out!!!

One Little Word Canvas, focus | shurkus.com

One Little Word Canvas, focus | shurkus.com

One Little Word Canvas, focus | shurkus.com

One Little Word Canvas, focus | shurkus.com

Tim Holtz Idea-ology POSTALE Tissue Wrap Paper
*Dina Wakley Ranger GEL MEDIUM Media MDM41740
*PRE-ORDER Tim Holtz Distress Paint PEACOCK FEATHERS Ranger TDD39716
*PRE-ORDER Tim Holtz Distress Paint BROKEN CHINA Ranger TDD36319
*PRE-ORDER Tim Holtz Distress Paint ANTIQUE LINEN Ranger TDD36272
Tim Holtz Distress Paint WILD HONEY
Tim Holtz Distress Spray Stain VINTAGE PHOTO Ranger
Tim Holtz Distress Spray Stain WILD HONEY Ranger
Tim Holtz Distress Spray Stain PEACOCK FEATHERS
*PREORDER Tim Holtz Layering Stencil 2014 CHEVRON ths024
*PREORDER Tim Holtz Layering Stencil 2014 NUMBERED ths020
*RESERVE Tim Holtz Layering Stencil RAYS THS003
*RESERVE Tim Holtz Layering Stencil BUBBLE THS002
Ranger TEXTURE PASTE
*PRE-ORDER Dina Wakley Ranger PALETTE KNIFE Media MDA41771
*PRE-ORDER Tim Holtz Idea-ology LETTERPRESS TH93130
Ranger Large 2 oz MISTER BOTTLE Inkssentials
*Ranger Inkssentials US HEAT IT CRAFT TOOL HIT00471
*Ranger Inkssentials Non Stick CRAFT SHEET Reusable 15 X 18 Stamp Paint Ink
Tim Holtz Distress Ink Pad WALNUT STAIN
*PRE-ORDER Ranger MINI ROUND INK BLENDING TOOLS IBT40965
*PRE-ORDER Ranger MINI ROUND FOAM REFILLS for Mini Round Ink Blending Tools IBT40972
*PRE-ORDER Dina Wakley Ranger UMBER Media Heavy Body Acrylic Paints MDP41177
*PRE-ORDER Dina Wakley Ranger STIFF BRISTLE BRUSHES 4 PACK Media MDA41627
*PRE-ORDER Dina Wakley Ranger STIFF BRISTLE BRUSH 1″ FLAT Media MDA41641
*Tim Holtz Idea-ology SANDING GRIP Block Tool Sand TH92482
InLinkz.com


  • Twitter
  • Facebook
«
»

Filed Under: artsy fartsy 13 Comments

Comments

  1. Donna says

    April 4, 2015 at 1:44 am

    Amazing, Jenn. Just beautiful!

    Reply
  2. Zoe Hillman says

    January 19, 2015 at 6:18 am

    I absolutely LOVE your canvas! The different textures and colours are gorgeous and I bow to your ability to leave blank space. So nice to see someone else who doesn’t clean their stencils. Thanks for sharing the step-by-step, your photographs are beautiful. My favourite 12 tags so far. 😉

    Reply
    • shurkus says

      January 19, 2015 at 9:44 am

      awww thank you so much zoe! The only thing i clean from my stencils is paste- why would i waste creative time with that silly nonsense 😉 Leaving white space is HARD… it’s something i have to keep in the back of my mind so that I don’t over clutter. I really appreciate your sweet comments!!

      Reply
  3. Mary Whitcomb says

    January 13, 2015 at 4:59 pm

    I just love this… you do such beautiful art!

    Reply
    • jenn shurkus says

      January 19, 2015 at 8:27 pm

      thank you so much mary- so sweet of you!

      Reply
  4. Kay Miller says

    January 12, 2015 at 8:44 pm

    Oh my goodness!! This is totally amazing! So fun to see all the steps you used to create this masterpiece!! Just WOW!

    Reply
    • jenn shurkus says

      January 19, 2015 at 8:28 pm

      thank you so much Kay! As I was creating it, each phase was yummier then the next so i kept snapping pics 😉 instead of flooding my instagram feed i figured they deserved to be in a blog post instead! Appreciate your comment!

      Reply
  5. Cresta Woodruff says

    January 12, 2015 at 1:46 pm

    This is awesome! Thanks for the step-by-step. I am planning to make some sort of canvas/wall hanging for my One Little Word, but since I have never actually done any mixed media type project before, I was sort of unsure of how to start. Your post is a big help! Hope you have a fantastic day!

    Reply
    • jenn shurkus says

      January 19, 2015 at 8:29 pm

      You are very welcome cresta! Let me know if you have any questions- I’m sure your piece of art will be AWESOME!

      Reply
  6. Kim Howard says

    January 12, 2015 at 10:00 am

    Love all the texture on this canvas and the colors are amazing! Beautiful job!

    Reply
    • jenn shurkus says

      January 19, 2015 at 8:29 pm

      thank you so much kim 🙂

      Reply
  7. Gail Armata says

    January 11, 2015 at 6:59 pm

    Love love love this. Someday I will make one of these. Love your canvases.

    Reply
    • jenn shurkus says

      January 19, 2015 at 8:30 pm

      thank you so much gail, i appreciate that! – someday is now- just put something on the canvas… the moment you get started it will all start to flow together 🙂 promise

      Reply

Leave a Reply Cancel reply

Your email address will not be published. Required fields are marked *

This site uses Akismet to reduce spam. Learn how your comment data is processed.

Jenn Shurkus | {creative chick}Hey everyone! I’m Jenn- just a {creative chick} that likes to create things. I’m wicked excited that you are here! Learn more about me here or contact me. Enjoy!

follow me

  • Instagram
  • Facebook
  • YouTube
  • Email

Search this site

 Just Add Glitter Online Class Find all the details about this class here
jennabler alert Find links to all my favorite places to shop here
online classes free printables

I Design For

Simon Says Stamp Lawn Fawn Tim Holtz Ranger Ink

{creative chick} series

Get Cracking on Christmas Cape Cod Stamp Set Inspiration

I Teach With

Lawn Fawn Copic Markers Ranger Educator

SHOP

Simon Says Stamp Lawn Fawn Blick Arts

join in

Lawn Fawn Create With Us Lawn Fawnatics Challenge

Disclosure

I participate in affiliate programs. I receive a commission when products are purchased through links on this website. All products linked below the posts of my creations are the actual products I used in creating my projects. I do not, and will not, share or review products that I would not personally recommend or use.

Archives

Privacy Policy

Copyright © 2022 · Adorn theme by Restored 316

Copyright © 2022 · Adorn Theme on Genesis Framework · WordPress · Log in

Subscribe to the {creative chick} email newsletter!
You will receive creative inspiration and updates on my classes and events (online and in-person).
Your information will *never* be shared or sold to a 3rd party.