
I have been wanting to dive into Project Life for about a year now… but with moving, unpacking, settling, a busy summer and hectic fall… it just didn’t happen.
For those that don’t know what Project Life is it is basically a memory-keeping system created by Becky Higgins. You use photos, text and “stuff” to document your life weekly. You can read more about it here.
I really wanted to start this project with moving to the lofts. I figured even though it wasn’t the beginning of a new year it was the beginning of a new chapter in my life. I was taking advantage of photo print sales and picking and sizing my photos and getting them printed, but just didn’t have time to sit and start to create pages. I actually was overwhelmed with how long the process of just getting photos sized and printed took. I know Project Life is supposed to be a simpler way of scrapbooking and I agree, but I also knew I was going to have to get into the flow of it and develop my own system for doing things. I plan on sharing all of this with you here!
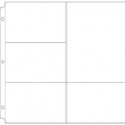
Last summer I purchased some Project Life supplies when I was teaching at Ink About It. I got the Midnight Core Kit and a big box of photo pocket page refills in design A. I knew with the Midnight Kit being primarily black and white that I could use my stash of pattern papers and embellishments. I also knew I had a bunch of We R Memory Keepers divided page protectors from when Colorful Creations closed, but to get started I wanted to start in the true format of Project Life. I will definitely be mixing those page protectors in as I go along.
So as I was approaching 2014 I realized I had a TON of printed photos, and felt wicked far behind in this project I hadn’t even started yet. I was discouraged. I continued to pin ideas, and read about Project Life but I wasn’t creating anything. One thing I did gather was most people are printing at home. This helps them get the sizes of photos they want, and a quick turn around time in having the photos in hand to create the pages. This appealed to me. I have a HP Photosmart 7300 series printer from when Colorful Creations was open. The inks were expired, but I felt this was worth investing in new inks to see if I liked the results. Ali Edwards also mentioned when she prints at home she is using a nice quality matte presentation paper/cardstock- so I chose this Epson paper.
I have PhotoShop thanks to my day job, but I have been recommending Pixelmator to a lot of friends for a more affordable option. Chris uses it all the time and compliments how much it can do. With Pixelmator you can resize images, crop, add text to photos etc. and only for $30! (Note: Pixelmator is in the mac app store).
The following tips can be used in most photo editing software apps.
In PhotoShop I create a new document that is 8.5×11 and 300dpi. You want to set your dpi to be high so you get the best quality out of your printer. Then I open iPhoto and export any photos I want to print. Make sure you export at the largest size and highest quality. Using iPhoto I can take photos I have shot with my iPhone, iPad, or even my Canon SLR. Whats nice is on my iPhone all instagram photos are stored so I will be able to print those as well. Once I get all the photos exported from iPhoto I then open them in Photoshop. With each photo I crop it if necessary, edit the color etc if necessary (most of the time this isn’t needed as I am already editing my photos right on my phone before I share them on instagram) then I go to “image size” here I change the dpi to 300 and the print size to the size I want it (3×3, 3×4 or 4×6 are common for the style of page protectors I am using). Once the photo is re-sized I copy it, and paste it onto the new 8.5×11 document I created. I then fit as many images as I can on this 8.5×11 sheet, I am a sucker for saving paper 😉 . Once the sheet is full of images I go to print the page. I make sure in the printers settings I select the kind of paper I am using and I choose “best” print quality. I can’t express enough how impressed I am with the quality of the prints! Being able to print at home is definitely going to help me stay on top of things! It also allows me to be creative with the sizes that I am printing the photos at.
One more tip before I share with you some of my pages. I decided when I started Project Life for 2014 I am also going to catch up on the past year of being in the lofts. So as I scrapbook the current week, I am also going back in time and scrapbooking last year. In order to help me remember what happened which week I am using the Momento App on my iPhone. This app is fabulous because it automatically compiles any social media posts by day. It is in a calendar format so it is super easy to go back in time, or find the exact day you are trying to remember. It will compile posts from Facebook, Twitter, Instagram, Foursquare, Flickr and more. If you don’t post to social media a lot you can also jot your own notes, or upload photos so that you have a record to look back on. I know I am not using this app to its fullest- but will be using it more and more as I continue on this Project Life Journey.
Hopefully some of these tips and things I have discovered will help encourage you to start this project. I really like that I am capturing the everyday (which is how I have always scrapbooked really) but it is inspiring me to document it on a more regular basis. My first few weeks are pretty photo- heavy. I know that won’t always be the case but for the weeks where I have less photos I will focus on writing a bit more of what I am currently enjoying, goals I have, thoughts in general.
I would love to hear if you are working on Project Life- What is working for you? Any tips that you might share. If you have wanted to start Project Life and haven’t yet- how come? What is holding you back? Maybe I will have some advice to help- Leave me a comment or email me.
Ok- onto the inspiration. I do have to admit these pages are a bit tricky to photograph, but hopefully you will get a sense of what the pages are like!

Above you can see how I am also playing with my silhouette! I even welded together the numbers to cut out the 2014! I love this machine and have been getting a TON of use out of it 🙂 This is my cover page for 2014

Project Life 2014, week 1

Project Life 2014, week 1, left

Project Life 2014, week 1, right

Project Life 2013-loft, cover

Project Life 2013-loft, week 1

Project Life 2013-loft, week 1- left

Project Life 2013-loft, week 1- right









I’m working on printing out all my 2013 photo for Project Life. My plan is to put it together next weekend at a retreat. I’m doing a monthly approach instead of weekly.
This weekend I bought the Midnight kit because I think the neutral color scheme will work with almost anything. Like you, my plan is to add a bit of patterned paper, stickers or embellishment to add a pop of color.
Love all the shared layouts. I have started to plan printing this weekend to start. I think I want to do a black and white layout thanks to seeing all the cute cards. I find that starting with black and white doesn’t feel so overwhelming trying to get things to work together and not clash (always my problem :P)
Great tips, Jenn! I bought the Amber Edition over a year ago, and all I’ve done is put the date cards in! You’ve inspired me to get movin!
Fabulous post Jenn! Happy for you that you are getting this underway. I’ve not managed to do the weekly thing – but I have done it monthly and love it. I’m actually grateful you did this post – Sarah doesn’t know this, but Katie and I are buying her the core materials for this for her birthday so she can easily document what goes on for Baby B. I’ll definitely be telling her to check out this post 😉
Thanks for all the tips Jenn.
I started my PL when my grandson was born last February. I still continue to do it, but found I needed to do what I could and not worry about getting everything in. I love the format too. I use ohlife.com to record my daily doings, it’s great because you get a reminder (and sometimes I don’t respond). You can print everything you’ve logged, so that’s what I do when I go to a crop and need to catch up.
I just might give the app your using a try. I would like to continue into 2014, especially with my grandson doing so much now.
I have a great little printer called the selphy 900 which is wireless and you can print a variety of pictures on a page, so that’s useful to me to print at home. It is about $79 on sale and the paper/ink packs often go on sale as well.
Thanks for sharing!
Brenda
i did PL in 2013 and loved each and every moment of it. i plan to continue in 2014 [i do monthly/event spreads]. works best for me. my life is too mundane to focus weekly! LOL!
i print photos directly from my phone using the walgreens app. i can pick up in an hour. i save any “real camera” photos for shutterfly’s 99 prints for $0.99 deal. it’s really helping me use up my stash.
can’t wait to follow along with your pages! 🙂
Hi, Jenn—As always, loving your creations! Thank you for the tips, too!
Love your PL, inspiring me to think about it. I have always printed my pictures, but use my canon software that came with my camera…And it allows me to do something similar fitting many photos on one page to economize my paper…….and I am able to import from iPhoto and anywhere else as well…..looking forward to seeing how you develop your pages as time goes on…..thanks for sharing,
AWESOMENESS Jenn! LOVING your pages! TOTALLY agree that printing pics at home is a BIG aid to staying on track! I am Photoshop illiterate so I have been using a combo of Picassa (I like it best to add text) and PicMonkey (<3 their effects & overlays) to edit my pics. Keep it up girl!