
Hi everyone! I’m here today with a bit of a different post. I wanted to share some organizing tips. This may become a “series” as I share other things in my room, but don’t hold your breath on that 😉
If you are visiting my blog for the first time or have not yet subscribed – be sure to do so! I share lots of handmade projects every week delivering them straight to your inbox! I also occasionally share information about crafty classes and new product releases I love. Subscribe here.
I recently posted some pictures on Instagram and Facebook of how I am organizing my ink blending tools I use with Distress Ink, and they have been wicked popular. I thought it would be good to create this post so other people will see and I can answer all the questions I have been getting.
I should start off by confessing: I LOVE DISTRESS INKS!!!!
I use them ALL THE TIME. I love both the regular distress and oxide distress. When the Distress Mini Ink pads came out, I fell back in love with the pads again. I loved the convenience of having them all on my studio table, and they were easy to grab and use. Since I was using them so much again I made sure when I reorganized my room earlier this year, that there was space for the full-sized pads easy for me to grab and use. So I have them right in front of me in ink pad storage from Organize More.
Anyways, since I use these pads so much I wanted to dedicate an ink blending tool per color for both regular Distress and Distress Oxide. This would save me SO much time and the blending foams would last longer since I won’t have to rip them off the handle over and over.
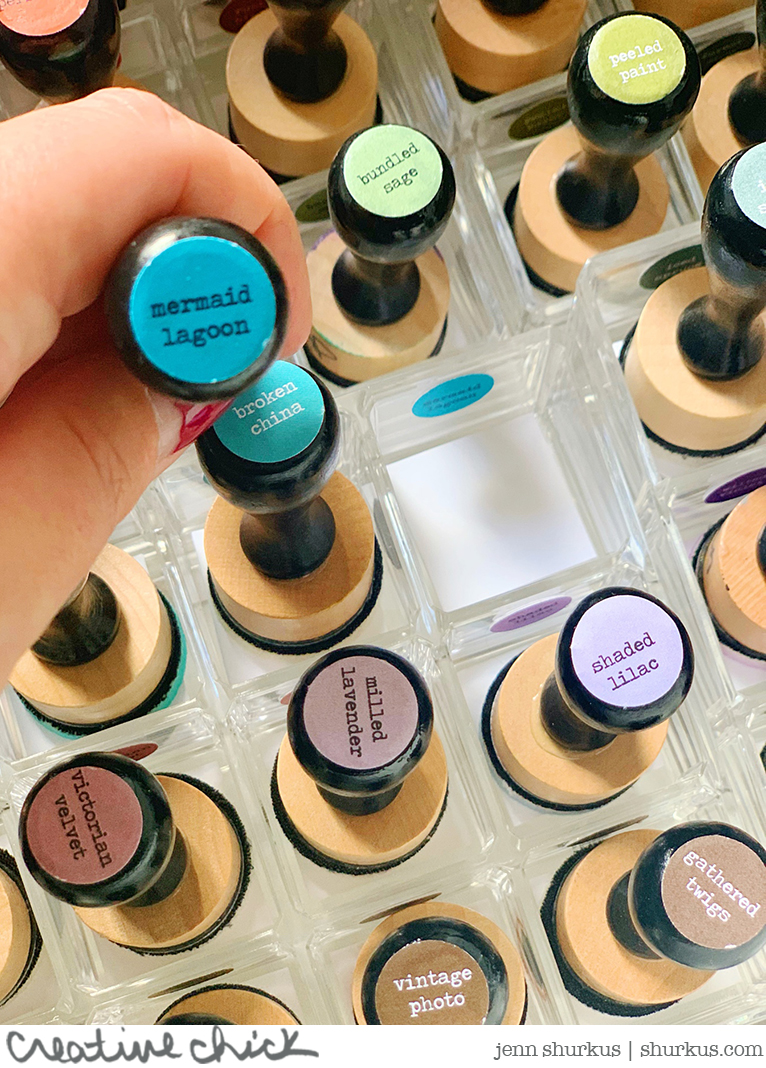
I dedicated 2 drawers to my left when I sit at my studio table. One for regular Distress Ink
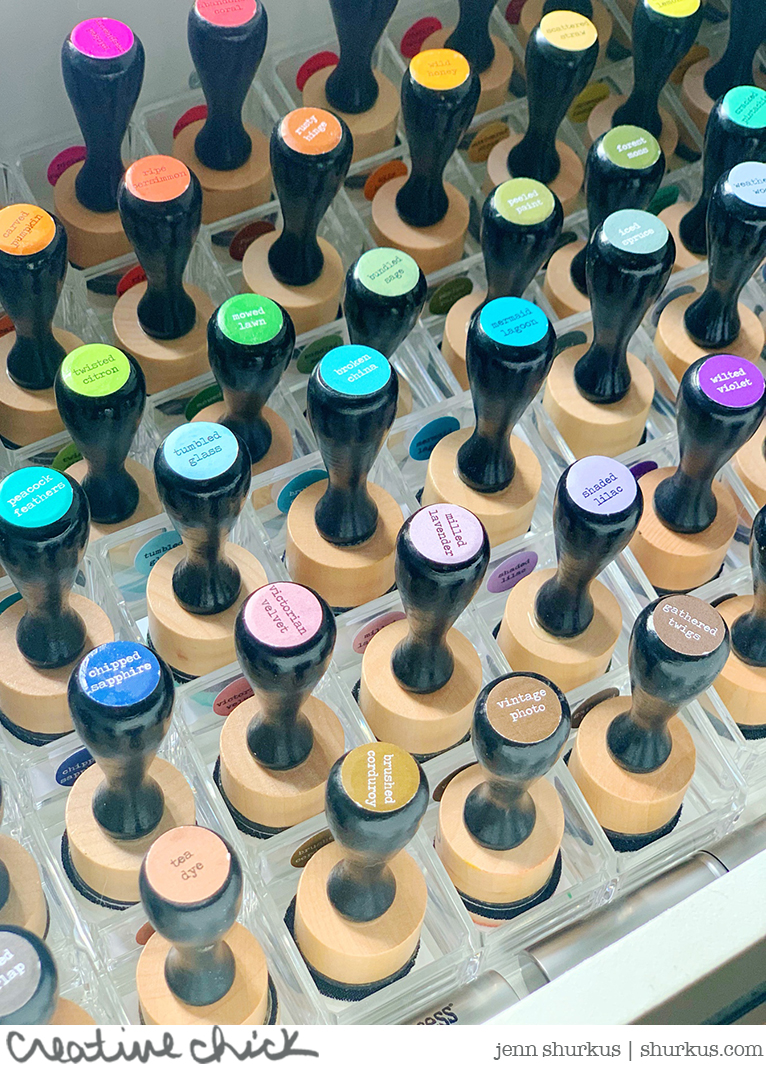
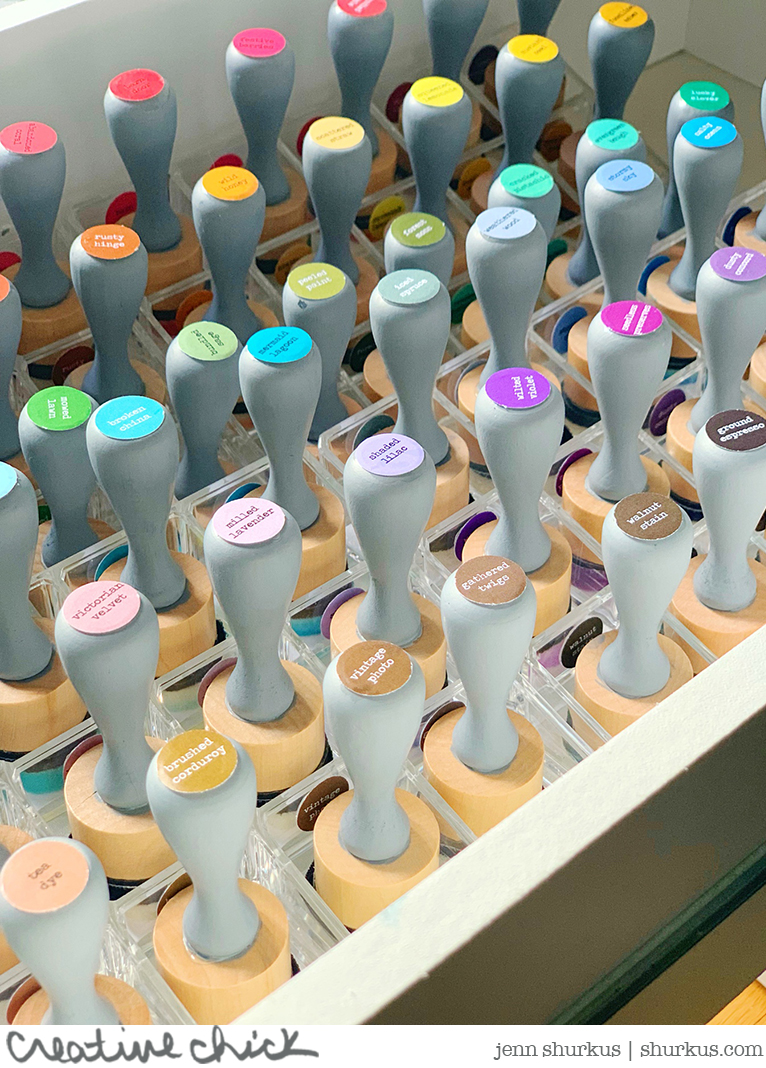
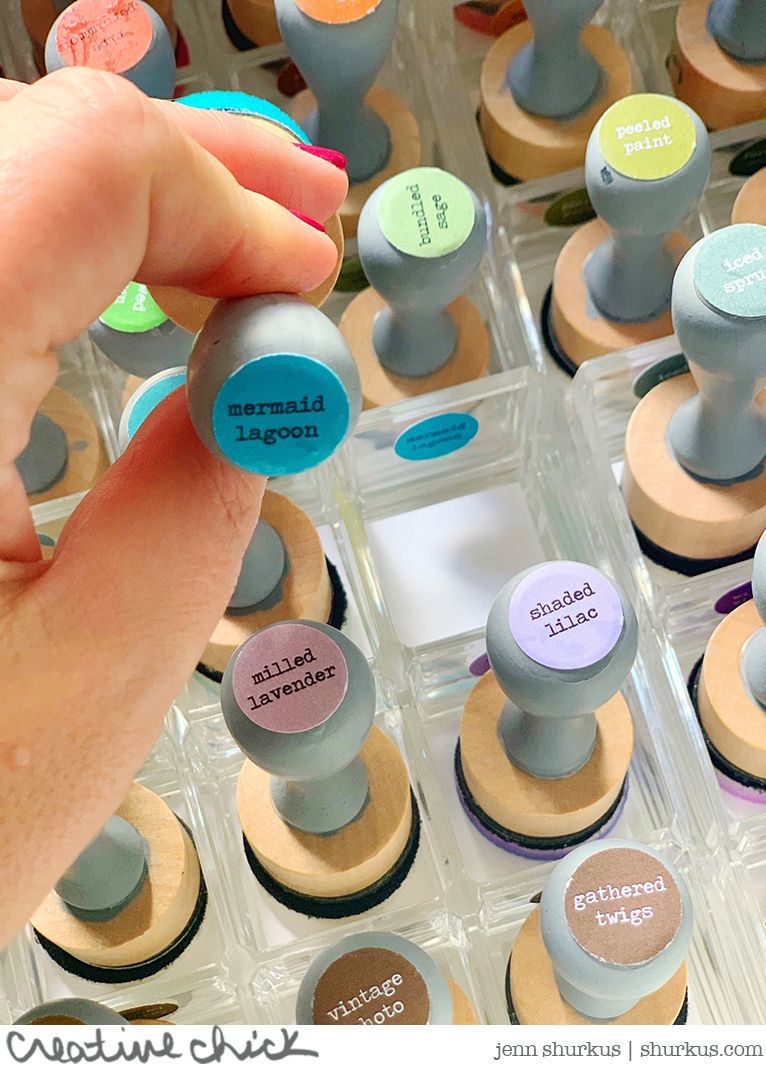
and one for Distress Oxide
Here is what I did:
- I purchased 15 compartment nail polish holders to hold the ink blending tools.
- I cut cardstock 1.25″ square to line the bottom of the nail polish compartments – especially the Distress Oxides are super inky, so this will help protect it.
- For the Distress Oxide handles, I painted them with Hickory Smoke Distress Paint. It took two coats to cover the black handle.
- Ranger has printables on their website. I used these printables to punch out to label the handles and the inside compartment
- Even though these labels are .75″ I used this .60″ circle punch to cut them out slightly smaller so they would fit on top of the handles.
I used glossy accents to adhere the labels to the top and the nail polish holders
Yes, to have 120 ink blending tools and foam is an investment, and yes it took about a day for me to do this whole project start to finish and also it does take up 2 drawers in my studio- this isn’t ideal for everyone, but for me who uses some variety of Distress Inks on most of my creations it was the best decision.
I find that now since they are so easy to use, and are convenient I use them even more and I also experiment with them more instead of doing the same old thing I always do.
You can see all the posts here on my site where I used Distress in some way here:
I also would like to mention, I have a facebook group: {creative chick} studio share where I host Facebook LIVES and have gone over such things as
You can join my group and be part of future LIVE demos here
Hope this inspires you 🙂 Thank you for stopping by!


Very nice! I know this post is a few years older, but I wanted to offer a suggestion that wasn’t available as an option when you made this post.
For the original Distress tools, you could use the Ranger mini ink blending tool (like you did for all of them) since they have black handles and it would match the black cases. For the Distress Oxide blenders though, you could purchase the Scrapbook.com ink blending tools since their handles are grey and so are the ink pads for the Oxide inks. They’re comparable in price and the same size and the foams from one fit perfectly on the other brand. The difference in handle colors would save the step of painting them grey.
Hope this helps! Thanks for your great posts!
GREAT storage idea!
Thank you for sharing 🙂
Thanks for sharing. I love seeing other people’s ideas for organizing. I love how accessible your inks are- I don’t use mine as much but I think if I moved them within reach I use them more.
I love this idea. I am expecting about 10 new DOX colors in a week and I’m currently working on the stickers and my example sheet. Your way is lovely. Please tell us where to purchase the polish holders and the name of them.
I don’t have Facebook or any social media.
I do love to look at anyone’s craft room. My little space wouldn’t be considered a craft room but one day it’ll happen. I like to see how people organize their products.
Love your organization and how you designated blenders for the Oxides and the regular Distress inks.
Oh, and you are to blame for my recent Distress Oxide ink purchases! I was steadfastly holding out and refusing to buy Distress Oxides because I could muddle along with my mini Distress inks. Well…. you gave me some suggestions for color combos for the very few Oxide colors I’d managed to get through various kits. And wouldn’t you know it, I fell hard and fast for them and had to buy more! My measly little collection went from 3 to 17 in the matter of a week. LOL! Thanks for being a Jenn-abler! 🙂
Hi Jenn, this is a great organizing tip! I’m still organizing my craft room; it’s not one of my Fortas. One organized I keep it organized but it’s getting there that’s the culprit. I finally started making some cards this weekend but took forever because of having to search for some of my things!! Anywho would love to see more of your organizational videos. When I finish my card tomorrow I’ll send you a pic! I tried w/Copic’s but I didn’t have enough of the brown Copic’s so tried in colored pencil then in Zig Clean Color Markers!! I’m pretty satisfied. Lol. Thanks Jenn 🎄🎅🏻🤶🏻 Merry Christmas🥰 Gayle
Yes, we all would like to visit your craft room. So organized. I’m working on mine but it takes allot of time. Thank you so much for your great tips.
Wow. So, when can I visit your craft room? ha-ha-ha You should give tours. No, seriously, for those of us who are super organized like you, it would be a dream. (laughing) Thanks for the tips. Merry Christmas! Feliz Navidad from sunny/warm San Antonio, Texas. (70*F)