
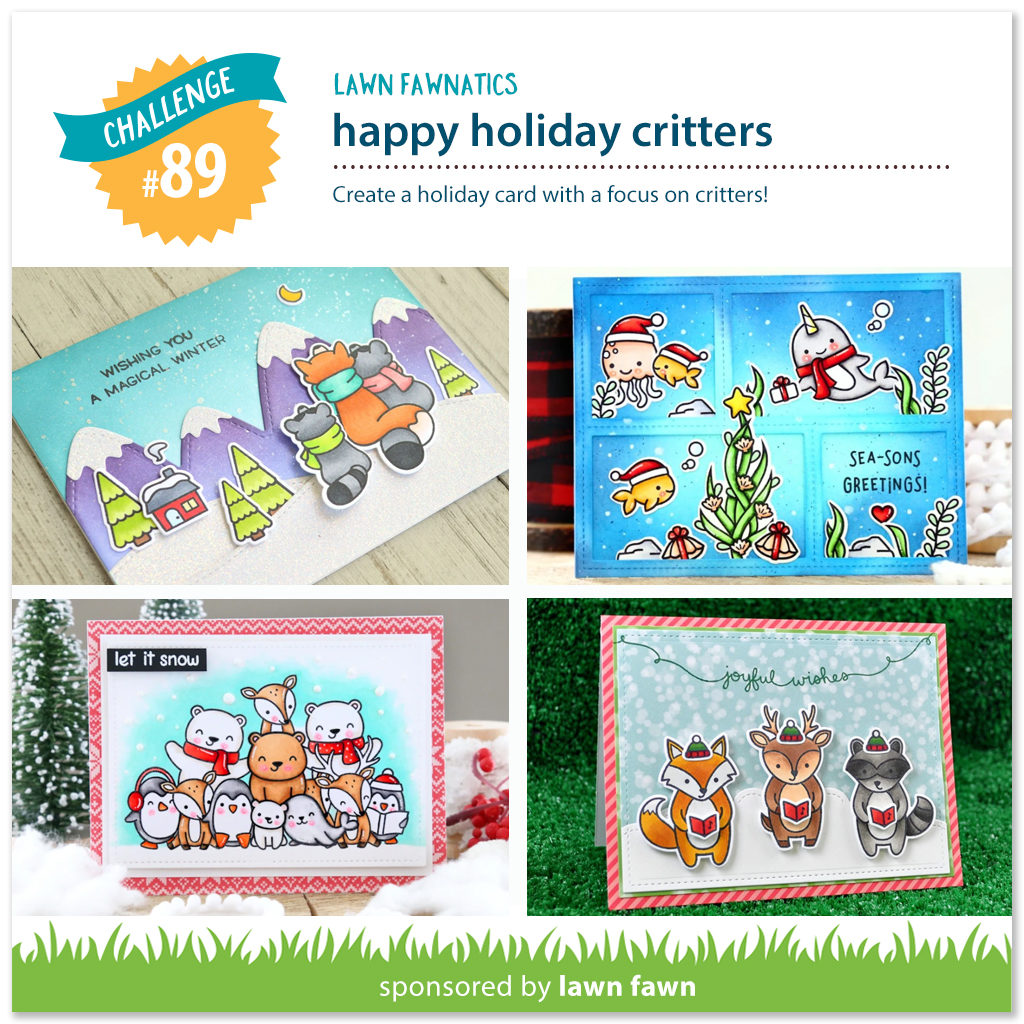
Hi, everyone! I am here today with the latest Lawn Fawnatics Challenge. If you love Lawn Fawn you should definitely follow us over on that site- we have a fabulous team that offers inspiration and chances to win gift certificates to Lawn Fawn!
It’s all about our happy holiday critters this week. Have fun creating a card where critters are the focus.
Warm Winter Wishes, Lawn Fawnatics

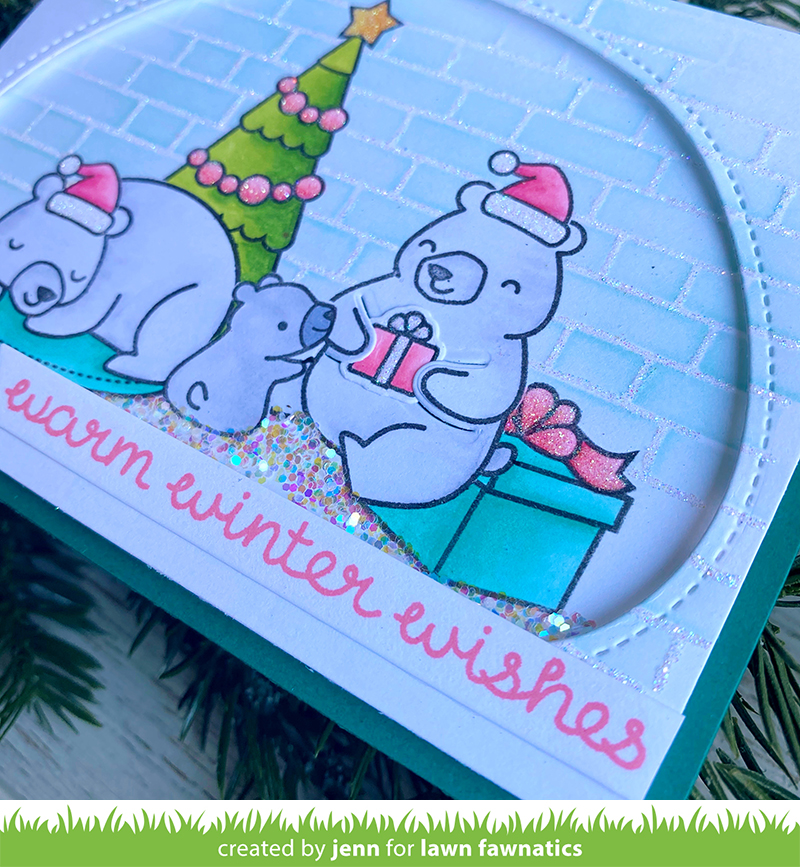
For this card, I wanted to create a fun winter scene with Den Sweet Den. I wanted the bears to be polar bears, all cozy in their igloo den. I also decided to do a lot of masking to create the scene, instead of die-cutting and layering.
Masking can be tricky, especially if you are doing a lot of it because you basically have to work backward- that is tough for my creative brain sometimes hehehe. I wanted to share with you the process of how I plan it out.
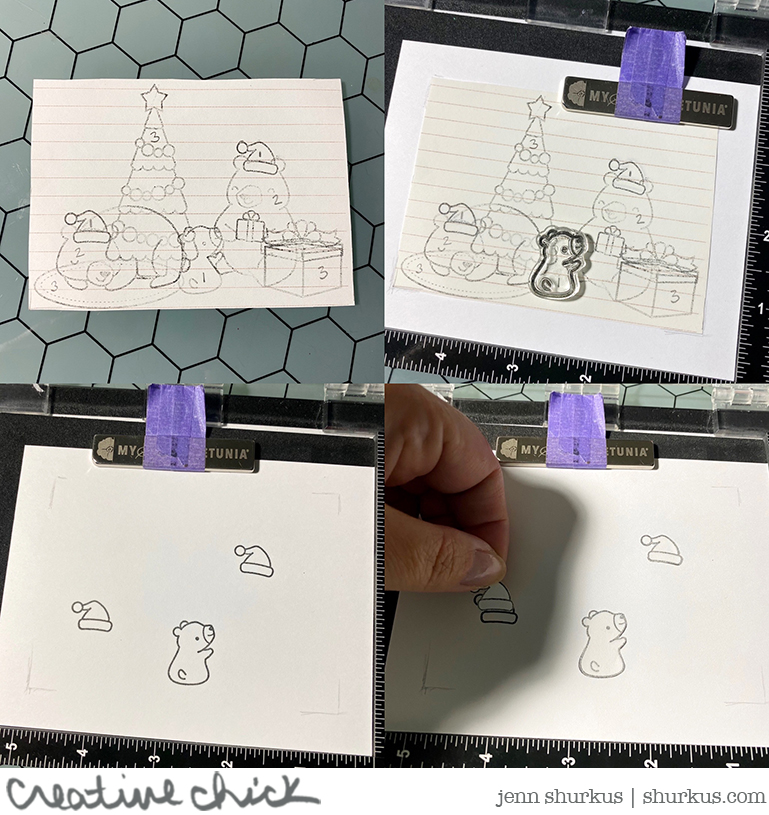
Top left photo: I start out by stamping the scene on scrap paper, overlapping the stamps- but just to get a sense of placement of stamps and how much space it is going to take up. I also numbered each image in the order of stamping. Whatever is in the foreground is 1 and work your way back to the background images. Multiple images can be the same number and stamped at the same time.
Top right photo: I wanted the scene to be centered on my card so that it will peek through the stitched den layer I had planned so I then penciled in where the scene would land on my card base. Then using my “sketch” of the scene I start to position the stamps by lining them up before picking it up with the misti to stamp.
Bottom left photo: you can see here where I have stamped all the images I marked as 1’s
Bottom right photo: I also stamped these images on masking paper, fussy cut and am now covering them before I stamp the number 2 images
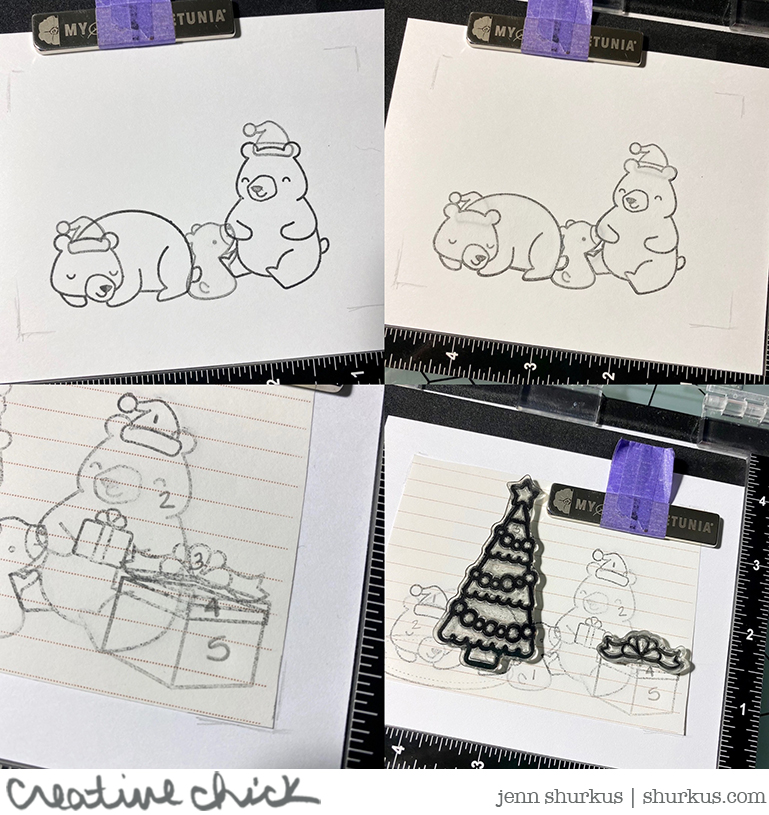
Top left: The larger bears were the number 2 images, so I stamped them next
Top right: Then I masked the bears. You keep following those steps: stamp, then mask, stamp, then mask
Bottom left: I realized I needed to fix my numbering system to make sure the 3 elements of the large present come out correctly
Bottom right: You can see here I am stamping the number 3 images. The present is actually three parts, so in this case, I am starting at the top with the bow and will work my way down.
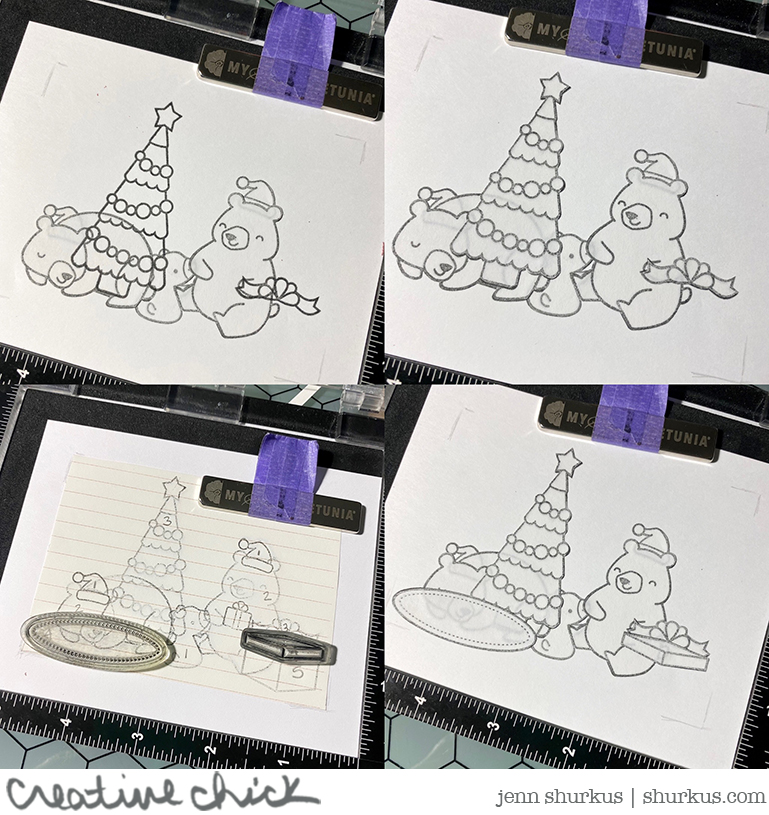
Top left: the number 3 images are stamped
Top right: then they are masked
Bottom left: then onto the number 4 images, stamping
Bottom right: then they are masked
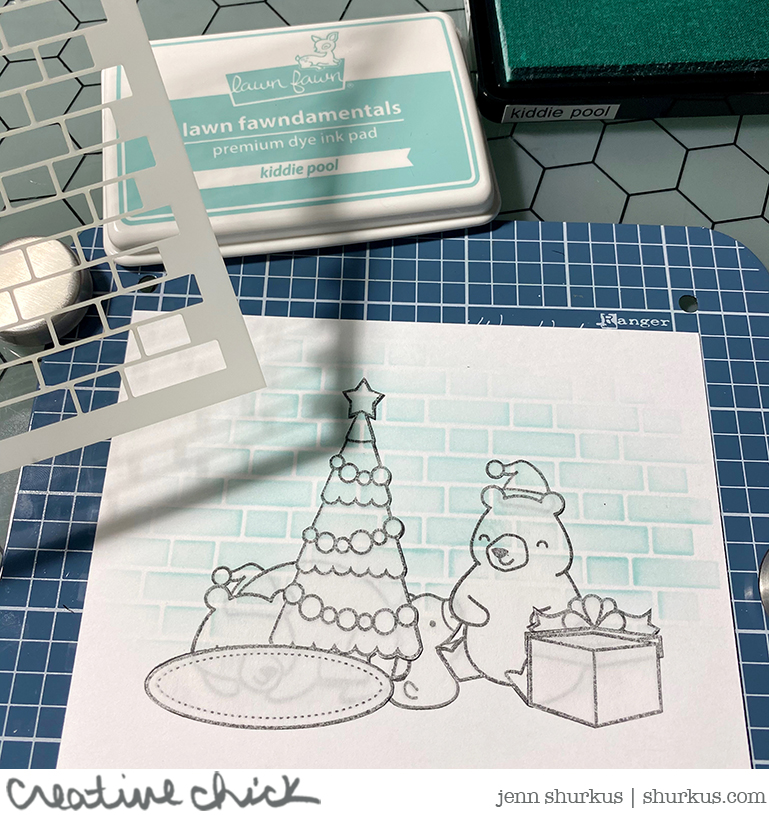
Once everything was covered with a mask, I then used the Brick Stencil and Kiddie Pool ink to lightly ink blend some “ice cubes” to create the igloo. I wanted the edges to run off, and for it to not be solid throughout. I also did this on another panel of white cardstock that I then cut out the Stitched Den from, to layer on top, creating their igloo home.
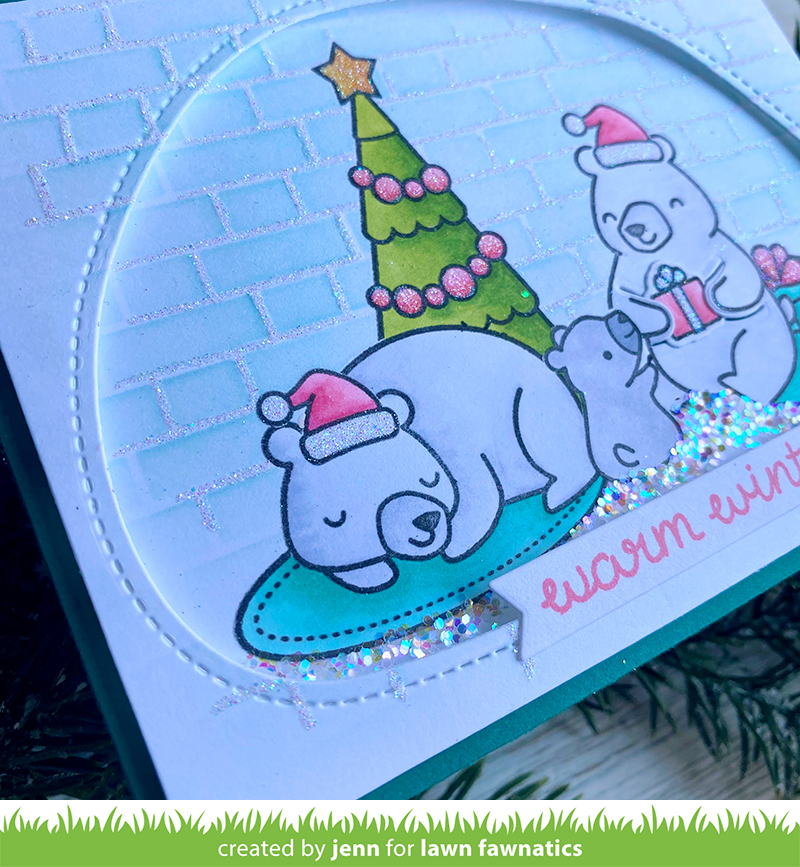
It is SO satisfying to peel off all of those masks and discover your adorable little scene! I then Copic colored the images. I used a Quickie glue pen and Prisma glitter to fill in between the ice, and then a Glue Tube and Chunky glitter to fill in the ground.
I love how soft and wintery it all looks!
I hope this helps you understand masking a bit more, and maybe my tips and tricks will inspire you to try it out!
Join us!
We host a new challenge every 2 weeks. We randomly pick a winner so really ANYONE can win! You just need to follow the theme and use at least one Lawn Fawn product. You do not need to have a blog to enter, you can upload your project to Instagram, Facebook or even Flicker- just be sure that it is public!
Supplies Used
Supplies I used are linked throughout the post. Click on the product name and you will be taken to the product. I use affiliate links when available which means if you make a purchase I get a small commission at no extra cost to you. Thank you for your support!
“”
 Lawn Fawn, Den Sweet Den Shop at: SSS | LF |
 Lawn Fawn, Stitched Dens Shop at: SSS | LF |
 Lawn Fawn, Christmas Dreams Shop at: SSS | LF |
 Lawn Fawn, Holiday Helpers Shop at: SSS | LF |
 Lawn Fawn, Kiddie Pool Ink Shop at: SSS | LF |
 Lawn Fawn Bubblegum Premium Dye Ink Pad Shop at: SSS | LF |
 Lawn Fawn, Brick Stencil Shop at: SSS | LF |
 Lawn Fawn, 80 LB WHITE 8.5 x 11 Inch Cardstock Shop at: SSS | LF |
 Hero Arts, Misti Mini Black Shop at: SSS |
 Mini Misti Shop at: SSS | LF |
 Lawn Fawn Glue Tube Shop at: SSS | LF |
 Rainbow Glue Tube Holder Shop at: Shurkus |
 Glue Tube Holder Shop at: Shurkus |
 Simon Says Stamp, Masking Paper Shop at: SSS |
 Sakura Quickie Glue Pens Shop at: SSS |
 Lawn Fawn, Chunky Glitter Shop at: SSS | LF |
 Lawn Fawn Prisma Glitter Shop at: SSS | LF |
 Fiskars Microtip Scissors Shop at: SSS |
3M Scotch DOUBLE-SIDED FOAM TAPE Permanent Shop at: SSS | LF |
 Lawn Fawn Stamp Shammy Shop at: SSS | LF |
 Mermaid, Stamp Shammy Holder Shop at: Shurkus |
 Lawn Fawn, Starry Shammy Case Shop at: SSS | LF |
 Altenew, Mini Blossom Die Cut machine Shop at: SSS |
 Spellbinders Platinum Shop at: SSS |


Not to be completely crazy… where is the hat from??? That card is so beautiful!!!! A lot of work went into it and your results are perfect!
Wow! Allot of masking on that one but so cute in the end. Love it. Don’t you just love some of the Lawn Fawn animals? They’re so cute.
This card is so amazing!!! I love the colors that you used. Now to get out my bear stamps!
Sweet scene. Darling images. Great showing how to do a one layer card. I always have to really think when doing one.
So adorable card.
Super cute! The masking explanation is definitely helpful
Wow! So clever & cute! Great way to get so many in one card! Coloring is perfection, too!
Love your card and the mask explanation is super helpful. Thanks!
I love your explanation for your masking process! I’ve never seen anyone describe it this way and it’s really helpful! I’m a sucker for dies but you never know when this will come in handy!