Looking for the Papercraft & Scrapbooking Magazine Blog Hop?
Looking for this weeks Simon Says Stamp Wednesday Challenge post?

Hey everyone! I am sad that this is my last Guest Post for Create a Smile. Create a Smile is a new company based in Germany. I am really proud of Christine for taking the leap and following her dreams and I love supporting that! Stay tuned though I already placed another order and have plans on using those goodies on future posts!

Now on today’s post! Using stencils is so popular right now in all kinds of papercrafting projects. I wanted to share a fun way to use these stencils in a different way!
Create a Stamp Supplies:
I used 2 stamp sets from Create a Smile. Your View and Perfect Tune. and one of their stencils Wave of Stars.
Other supplies used for this project:
(additional supplies linked below)
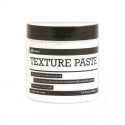
- Ranger Texture Paste
- Distress Watercolor Cardstock
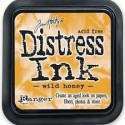
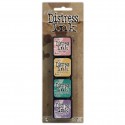
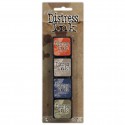
- Distress Inks ( Picked Raspberry, Wild Honey, Peacock Feathers, Seedless Preserves)
- Mini Blending Tool
- Painters Tape
- Palette Knife
- Ranger Craft Sheet
- Waterbrush
Photo Tutorial:

1. Working on your Ranger Craft Sheet. This will make clean up SUPER easy!
2. Hold down a piece of Distress Watercolor Cardstock to the craft sheet. I use a washi tape I don’t like OR painters tape 😉
3. Adhere the stencil over the cardstock
4. Spread Ranger Texture paste through the stencil with a palette knife. I like Dina Wakley’s plastic one and it has a lot of give and seems to help get the paste in all the nooks and crannies
5. Clean your stencil
6. Heat set the Texture Paste
7. Reposition the stencil over the paste and hold in place with tape again
8. Using the mini blending tool and Distress Inks, ink over the stencil. The stencil will create a mask so you will only get ink on the Texture paste.
9. Clean your stencil
10. repeat steps 1-9 moving the stencil down the page and switching Distress Inks as you go

Tips & Tricks:
- Use a heavy weight cardstock to hold up to the Texture paste. I used Distress watercolor paper (my fave!)
- Use painters tape to hold your cardstock and stencil in place.
- I chose to use Texture paste instead of embossing paste because I wanted my colors to be really vibrant and pop off the page. Texture paste works best when you will be inking. I also get a better result from Texture paste when I want to heat set it to speed up the process.
- Be sure to clean your stencil in between each step. You don’t want the Texture paste to dry on your stencil and you don’t want any left over ink to be on the stencil and mix with other colors.
Thank you to Christina and Create a Smile for having me as a guest designer! I have had SO much fun playing with your stamps. I already placed another order and will be featuring them in my COOL-est Card Series in Januaury!
















Love the colors on this beauty, Jenn! Such a sweet card!
What a fun and vibrant card! That star stencil is amazing! Thanks for sharing your technique 🙂